Monday, March 19, 2012

Meatless Monday...Fail

Today I've been sort of wracking my brain on what to share for Meatless Monday since last night's dinner was a huge fail (Cheesy Quinoa Cakes= Greasy Crumbled Mess).  I sort of had high hopes that the Quinoa patties would knock my socks off, but after trying many different varieties (black beans, lentils and now quinoa) I'm beginning to think unless it's beef, it doesn't belong in a patty.  I know.  Sort of goes against my meatless standards.  I will give it one last try soon and will reveal my final conclusion.


So, with no wow-factor leftovers, I was forced to make a sandwich for lunch today.  I had some homemade guacamole on hand, some veggies, flat bread and monterrey jack cheese.  I figured surely this would make some kind of a good combo.  It was good.  Actually, it was awesome!  The kids looked longingly at my sandwich and asked for one bite.  Knowing that their bite equals three-fourths of my sandwich, I thought about saying, "No, my loves.  This is mommy's delicious sandwich, finish your peanut butter."  But, I remembered the whole sharing thing...so I shared.  And they loved it too.  They also finished it :(


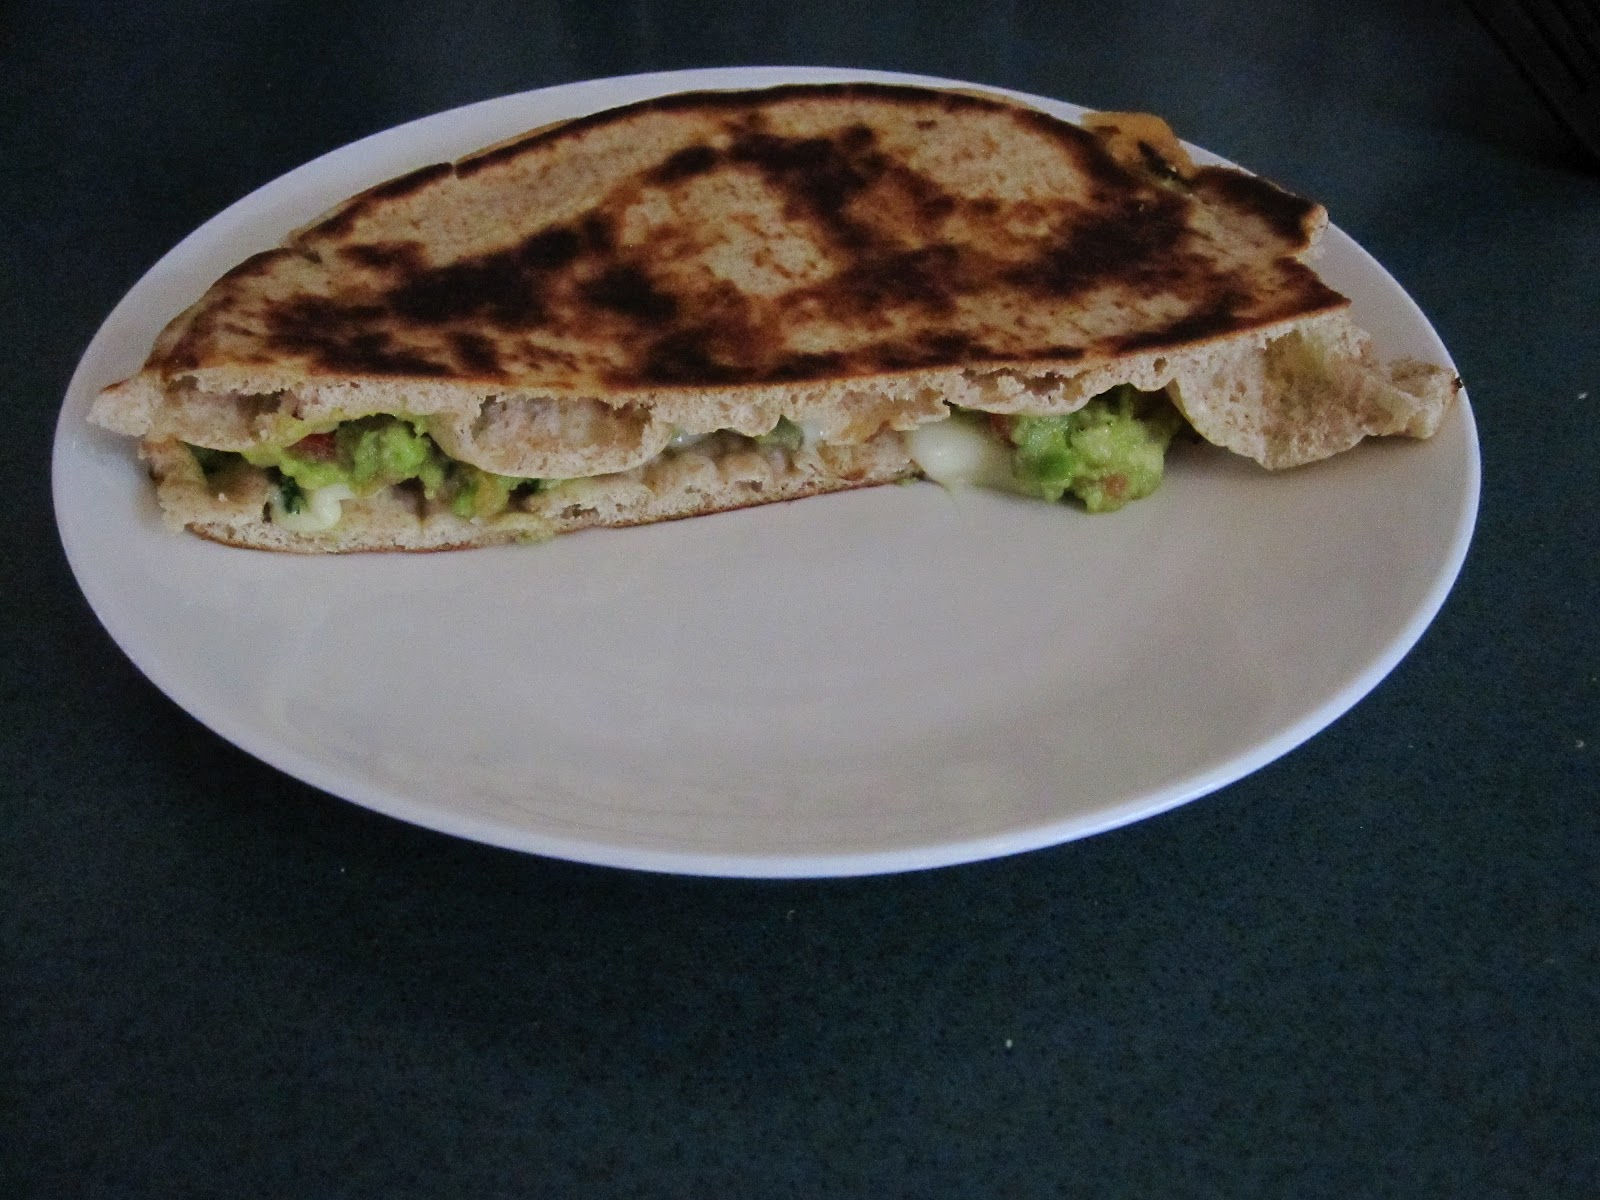
Grilled Guacamole Melt

1 whole wheat flat bread circle, cut in half (could also use pita pockets or tortillas)
Smidge of butter
Thinly sliced monterrey jack cheese
2 Tbsp guacamole (recipe below)
4 thin slices of tomato
Thinly sliced red onion
2 Tbsp. shredded carrot


1)  Lightly butter one side of each flat bread half.

2) On one half of the flat bread layer the cheese.  Spread with guacamole and top with veggies.  Top with other half of bread and grill buttered side down over medium heat until golden brown.  Flip and grill the other side until brown and cheese is melted.

3) Eat in hiding, so you don't have to share.

Guacamole
2 Ripe avocados
1 roma tomato, diced very fine
1/4 C. red onion, diced very fine
1/4 C. cilantro, chopped
1/4 tsp. garlic powder (more or less to taste)
1/4 tsp. kosher salt (more or less to taste)
2 Tbsp. lemon juice
1 seeded jalapeno, chopped fine (optional)

Combine all ingredients and mash until smooth (or slightly chunky).  Chill, wrapped tightly in plastic before serving.  To store any remaining guacamole (but seriously, who has leftovers?) place in a small ziplock bag, being careful to remove all air from the bag creating a tight seal against the guacamole to prevent browning.

Thursday, March 15, 2012

Thrifted Thursday Just A Smidge Hippie...

I would consider myself one of those people who goes through style phases.  There was the turtleneck phase in middle school, where all I would wear were turtlenecks in every possible color.  The t-shirt phase.  The flannel/grunge + Doc Martens phase (I was fairly tame with this one...).  The preppy phase. The cardigan phase.   And then the cardigan phase reborn 10 years later.  


Then there was the vest phase... my freshman year of high school, I had these retro vests I would layer over my outfits.   They were actually pretty cool because they were vintage and were handed down to me from my grandpa.  But, sadly, somewhere along the way, I lost interest in the vests and gave them away.  Hands down my biggest fashion mistake was giving away those vests.  Not only because of their sentimental value, but they fit perfectly (my grandpa is a slight man) and were the perfect combo of menswear mixed with my girly style.  I've learned my lesson.   If something goes out of style, but I still really love it, I'll hold on to a couple of my favorite items for when fashion comes full circle again.


Several weeks ago, a good friend handed down to me a denim vest.  It was way cute (AND still had the tags on!) but I wasn't sure I could pull it off nearly 20 years later.  I sort of just stashed it away in my closet until yesterday.  I looked it over and decided maybe I could pull off a modified "hippie" look with it...
vest:  GAP hand-me-down
blouse:  super old
jeans: The Limited thrifted

necklace:  gift from a friend

shoes:  Lucky Brand thrifted

It was actually fun to put together an outfit from my past with a few modern twists...and of course thrifted and free is always a winner in my book!

What about you?  Did you go through any fashion 'phases'?  Have you revisited a style from your past?


Wednesday, March 14, 2012

Dude, Get On That Already...

So I've been feeling challenged to wrap up a few projects around the home front and blog front.  Do you guys read Young House Love?  I love reading their blog!  They are funny and punny and seriously get stuff done!  They've given themselves a "Dude, Get On That Already!" challenge to finish up some projects that have been set aside for too long. After reading their commitment to get stuff done, I've started to feel the fire being lit under me.


We have a lot of projects we'd like to accomplish around our house before May, so B and I are feeling the pressure to get er' done.  But, one project I've put off forever is simply organizing my blog.  Every week I do a Meatless Monday and Thrifted Thursday post.  The problem?  Well, those posts were just floating around on my blog.  If I, or anyone else, wanted to look up a specific recipe it was a huge pain to find the old posts.  Not fun.  So, I finally bit the bullet and added some nice little tabs up top to get things nice and organized and clean-up my blog!  Now, you can click on 'Meatless Mondays' and find all the recipes in one convenient spot!  Yay!  I have yet to organize the Thrifted Thursday posts, but that's next friends!  I'm sure I will continue tweaking things, and things may get worse before getting better...but hang in there with me okay?


Poor B.  I have a list of 24 'to-do's' (and counting) to get done around our place. But, I've committed to helping him knock it out.  Our house was built in 1916, so with age comes lots of up keep just to keep things looking fresh (and fixed).  I just know once we get started it will be refreshing to simply cross it off our list and put it behind us.  So, here's our Dude (and Dudette) Get On That!  List:


1)    build/Install Kitchen closet door
2)    re-attach Gutter (it fell off last week during a big gust of wind)
3)    build Kid's bunk-bed
4)    buy bunkbed from IKEA because we didn't build them
5)    re-finish dresser
6)    run new electrical in kitchen
7)    finish lower cabinets
8)    install backsplash
9)    new countertops
10)  install microwave above stove
11)  under cabinet lighting
11)  paint living room
12)  paint master bedroom
13)  install bathroom closet door
14)  paint garage
15)  clean up landscaping
16)  plant garden
17)  clean/organize basement
18)  paint basement walls
19)  install exhaust fan in bathroom
20)  new bathroom sinks
21)  resign to the fact that new bathroom sinks aren't happening
22)  new kitchen sink
23)  caulk bathroom doors
24)  install new kitchen window
25)  paint trim in bedrooms


Now that you've seen our huge list, I'm feeling accountable to getting it done!  Do any of you have a to-do list that just needs to get knocked out?  Does Spring have you saying 'Dude Get On That Already?!'

Monday, March 12, 2012

Meatless Monday...Thai Peanut Noodles

Wow...it's going to be a gorgeous week in Iowa, 60's today and 70's the rest of the week!  I think Spring is officially here! We had a great weekend with my parents who came up to celebrate my birthday, so this gal got away without cooking all weekend!  Last night around 10pm I realized I was back on kitchen duty today, which meant I should ease myself into things with a super-easy recipe. This Thai Peanut Noodle recipe is not only easy, but super-yummy!

This is actually one of those recipes my kiddos gobble up and then ask for seconds (probably because of the peanut butter).  When I originally made this, I sliced the carrots, but soon realized the texture was much better if they were shredded on a box grater.  I also used frozen broccoli florets that I steamed for 3 minutes in the microwave before sauteing all vegetables together.  Sliced red bell pepper was also a later addition which really made this recipe so much better!  Hope you all enjoy it!

Thai Peanut Noodles


1 pkg whole wheat linguine noodles
1 tbsp. cornstarch
1 C. chicken broth (or vegetable broth)
5 tbsp. creamy peanut butter
3 tbsp. soy sauce
3 tbsp. honey (or brown sugar)
1 tsp. sesame oil
1 tsp. fresh ginger, grated (powdered ginger is fine too)
1/4 tsp. crushed red pepper flakes (optional)
2 tbsp. sesame oil
2 garlic cloves, minced
1 C. broccoli florets
1 C. shredded carrots
1/2 red bell pepper, thinly sliced
1/2 C. sugar snap peas
1/4 C. chopped cilantro

Directions:
1) Bring a large pot of salted water to boil and boil pasta until al dente.
2) Meanwhile, in a saucepan over low heat, whisk cornstarch into the chicken broth until dissolved.  Whisk in peanut butter, soy sauce, honey, 1 tsp. sesame oil, ginger and crushed red pepper until combined and slightly thickened (about 5 minutes).
3) Heat 2 tbsp. sesame oil in a skillet and saute garlic just until fragrant. Add all vegetables except cilantro and saute until tender.  
4)  Drain the pasta (do not rinse) and toss with vegetables and peanut sauce.  Sprinkle with cilantro and serve.


Friday, March 9, 2012

Meatless...Thursday?...

Is it allowed to do a Meatless Monday post on Thursday?  Let's just call it playing catch up mkay? I sort of hit the wall recently between homeschooling, a Monday evening study B and I are going through, Awanas, youth group, work, small group and life in general.  All that said, I have had trouble eeking out posts for the last few weeks.

But, I will say one of my bright spots of late was a trip to San Diego with a few ladies from church to attend the CPC conference for those working in children's ministry.  It was awesome.  I learned so much and came away with tools to not only help me as I work with children and youth, but tools to help B and I raise our little ones up to love their Lord with all their heart!  Good stuff!

Here are a few pics from our time there:


It was so much fun...but my favorite part?  Not having to prepare any meals!  I'm not going to lie, having my food prepared for me every evening was pretty amazing.

What about B and the kiddos you ask?  Well, B held down the home front for a few days, and may I add he did an amazing job?  Seriously, he's such an awesome dad, and the three of them had such a great time together!  The two littles are a couple of lucky kiddos to have a dad like him!

Now that we're back to our routine again, and I'm back to cooking *sigh* I thought I'd share a recipe we were totally loving last night...caramelized mushroom, pepper and onion pizza with herbed goat cheese.  Oh. My. Word.  This was so good. The pizza was perfectly crispy, the veggies were nice and caramelized and the goat cheese...oh, the goat cheese.  This pizza was so good we fought over who would have the leftovers for lunch...


Caramelized Mushroom, Pepper and Onion Pizza with Herbed 
Goat Cheese

Crust:
4 1/2 C white whole wheat flour (all purpose is okay)
1 3/4 tsp. Kosher salt
1 tsp. yeast
1/4 C. olive oil
1 3/4 C. cold water

Combine all ingredients in a large bowl and beat with a mixer fitted with a dough hook until ball forms.  Cover bowl with a towel and let rise 1 hour.

Sauce:
1 can diced tomatoes
1 tbsp. olive oil
4 garlic cloves, minced
1 tsp. kosher salt

Place olive oil, salt and garlic in a small pot and cook just until garlic becomes fragrant.  Add tomatoes and cook 10-15 minutes breaking up the tomatoes until sauce begins to thicken.

Toppings:
8 oz. package mozzarella cheese, thinly sliced
1/2 red pepper thinly sliced
1/2 green pepper thinly sliced
1/2 red onion thinly sliced
about 6 baby bella mushrooms washed and sliced
4 oz. package tomato/herb goat cheese

In a small skillet with a bit of olive oil, saute peppers, onion and mushroom just until caramelized.  Sprinkle lightly with kosher salt.

To make the pizza:
Preheat oven to 500 degrees.
Take a large ball of the dough (you should have enough dough for four pizzas) and spread it on a lightly greased baking pan.  Top the dough with sauce, then a layer of mozzarella.  Spread the vegetables over the mozzarella and break off little bits of the goat cheese and sprinkle it over all.  Bake for about 10 minutes until crust starts to brown, then using a spatula, slide the pizza from the pan directly onto the oven rack and bake another 5-8 minutes or just until the pizza is bubbly and the bottom is nice and brown.  

psst...
recently I had the opportunity to talk about meatless meals on our local news.  If you want to check out the video, you can go here...http://whotv.com/2012/03/05/meatless-meals-families-save-cash-on-meals/